Thursday, April 28, 2011

3-Minute Microwave Muffins


Yes, you read that correctly..

Muffins made in the microwave in THREE minutes!

Unbelievable right?

When Mountain Man walked into the kitchen and groggily asked me what the heck I was going to make in the 20 minutes I had before I had to leave for work, I smiled and proudly proclaimed "microwave muffins."

Little did he know, that I had no idea if they would actually be any good or if they would even work for that matter.

Much to my surprise though, they turned out to be pretty darn good! Especially having been made in the microwave of such places!

Since discovering these perfect breakfast treats for the on-the-go business woman (or man), I've experimented with different ingredients and fillings, but the base recipe has stayed the same. They can be whipped up in a matter of minutes, popped in the microwave and ready to eat in 3 minutes...not to mention, they sit nice and cozy in a mug so you don't have to worry about muffin crumbs or messy hands.

So the next time you start to pour yourself another bowl of your same old cereal, use that bowl to whip up some delectable little muffins for your way out the door!


Microwave Muffins
Fills 3 small mugs (easily doubled for more people)

1/2 cup plus 6 TBS white whole wheat flour or AP flour
2 1/2 TBS sugar
dash of salt
1 tsp baking powder
1 egg (or mix 1 TBS flax seed meal with 3 TBS water and use instead of an egg)
6 TBS vanilla yogurt
2 TBS milk (I used skim)
2 TBS vegetable oil
dash of vanilla
*1/2 cup of mix-ins: blueberries, dried cranberries, blackberries, chocolate chips, bananas, etc.
*Brown sugar for sprinkling

In a small bowl, mix flour, sugar, salt and baking powder.
Add egg (or flax egg substitute), yogurt, milk, veggie oil and dash of vanilla and mix until combined.
If batter still seems a little thick, add a little more milk.
Fold in mix-ins of your choice.
Distribute batter evenly among mugs or small ramekins a little more than half way to the top.
*optional: sprinkle brown sugar over top before microwaving
Place in microwave on high for 3 minutes.


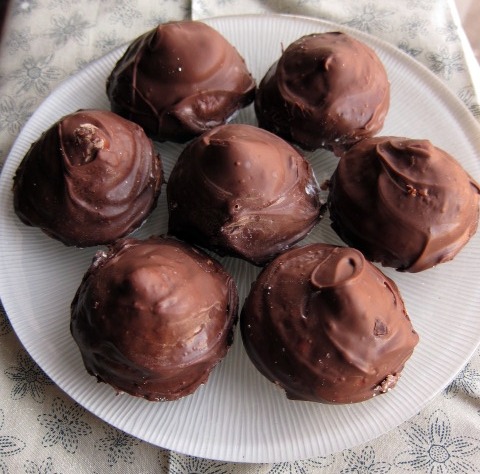
These are actually peanut butter and banana muffins: add a dollop of peanut butter, one chopped banana and a dash of cinnamon to your batter.

When I saw these little guys rise as much as they did, I was amazed. I wasn't around when Mountain Man got into his, but I did receive a lovely facebook shout out so I guess he liked em :)

Happy Baking!

Monday, April 25, 2011

Free Cakes for Kids: a Non-Profit Organization

A few weeks ago I was contacted by the coordinator of our local Free Cakes for Kids chapter. Through some lucky strike of the keyboard, she found my blog and after admiring my cakes, sent me an email asking if I'd become a part of this fantastic organization.

Free Cakes for Kids is a non-profit organization developed for families who are going through financially hard times and can't necessarily afford to provide their child with a birthday cake. With over 30 talented volunteers in the Killeen chapter, we devote our time and talents so no child will have to be without a cake any time soon.

I've always believed that food has a special power; there's a reason why holidays revolve around food, that we look for comfort in treats and why the kitchen table is where happiness is shared. And so I feel blessed to be a part of a group that offers families a little bit of happiness during a tough time through a very special birthday cake.

My first volunteer job was a Blue's Clues themed cake for a little boy's birthday...


Even though I don't have my own children, I've spent my fair share of time babysitting and Blue just happens to be one of my favorite cartoon pup. I tried to stay true to the show and incorporated her clues around the base of the cake.

 
"You gotta find Blue's paw print, that's the first clue!
And we put 'em in our notebook, cuz they're who's clues?!"


 "Blue's Clues!"


For those of you out there that love to decorate cakes, I hope you'll look into local chapters of Free Cakes for Kids. Not only would you be a part of a great cause, but you get to practice your decorating as well! Practice or not, his mother's warm words of gratitude were enough for me.

Happy Baking!

Monday, April 18, 2011

Cadbury Cream Egg Surprise Cookies


When I was a kid I used to give up candy for Lent.

But instead of focusing on the sacrifice part of the tradition, I looked at it as a means to hoard as much candy as possible the 40 days leading up to the Bunny's big day.

By the time Easter Sunday came around, I would have a bag full of candy waiting for me in my room...everything that I managed to save through various holiday parties at school and church- sneaky sneaky.

After my "sacrifice" was through, I would wake up and sneak a piece of candy before running downstairs to see what the Easter Bunny had brought us.

My favorite candy during the Lenten season, then and ever shall be, Cadbury Cream Eggs. I have to admit it takes me a little longer to finish an entire egg these days (thank goodness they make the mini ones now!), but I still look forward to getting a carton come spring.

Now that I have a blog I felt it was my duty to pay homage to my little creamy eggs of goodness and incorporate them into a cookie this Easter.


Cadbury Cream Egg Surprise Cookies
a swEEts original
Makes 12 cookies

1/2 cup butter (1 stick), softened
1/4 cup sugar
1 tsp vanilla
dash of salt
1 cup flour
12 pack of mini cadbury cream eggs
assorted sprinkles

Line baking sheet with parchment paper.
In a large bowl, cream butter, vanilla and sugar.
Add salt and flour, mixing until well combined and soft dough is formed (if you dough seems too sticky add a little more flour).
Unwrap your mini Cadbury Cream Eggs.


Roll a tablespoon of dough into a ball and flatten it with your fingers. Place an egg in the center of your dough.... 


...and gently press the remaining dough around the egg, until it's completely covered. 


Lightly roll in the palm of your hand to cover smoothly.
Once your egg is covered, roll in assorted sprinkles.


And place on prepared parchment paper.


Repeat until all your eggs have been covered, then place in fridge to chill for about 30 minutes.
With about 10 minutes left, preheat your oven to 350.
Place cookies in oven for about 10-12 minutes- these cookies won't really brown so just gently press into one to feel for doneness.
Allow to cool completely before sinking into.


Your little bunnies won't be able to keep their paws off these! 


Happy Baking!

Thursday, April 14, 2011

Strawberry Shortcake Scones with Whipped Vanilla Butter


As the days get longer, I long for the days of lazy summer afternoons spent at the pool or the beach; no cares in the world except tan lines and what we'd be doing later that evening.

But that's not how it works in the real world. Summer no longer carries the same meaning...

Warm weather in the real world just means the opportunity to wear open toed shoes and brightly colored cardigans to work...woop-di-dooo.

It's sad really. I think we should start a revolution... everyone needs a little summertime in their lives.

Until I get this all figured out I'll just gaze at the warm weather from my office window, watching the little kids on the playground across the street, dreaming of how life used to be.

And I guess I could eat some summer time treats like these Strawberry Shortcake Scones too..


Strawberry Shortcake Scones
Adapted from recipe at Jacob's Kitchen
Oven: 400 Bake time: 15-18 minutes
Makes 12 scones


4 cups AP flour
1/2 cup sugar
2 TBS baking powder
1 tsp salt
3 sticks cold, shredded butter
1 cup cold heavy cream
4 eggs, at room temperature
1 tsp vanilla
1 tsp grated lemon or orange zest
1 cup diced strawberries
1 egg yolk and 1 TBS water*

Preheat oven to 400 and line baking sheet with parchment paper.
In a large bowl, add flour, sugar, baking powder and salt.
Using a cheese grader, shred cold butter into bowl.
Use your hands and incorporate the butter into the dry ingredients until butter is the size of large peas.
In a small bowl, whisk cream, eggs, vanilla, strawberries and zest.
 Add to flour/butter mixture and mix until just combined.
Turn out dough on lightly floured surface and pat out into a rough rectangle.
Fold dough over on itself a few times (4 or 5).
Roll dough out into a large disc about 1-inch thick.
Cut scones into triangles or cut using a cookie cutter and place on prepared baking sheet.
Lightly brush with egg yolk and water.
Place scones in oven and bake for 15-18 minutes or until scones are lightly browned.
Serve warm with Whipped Vanilla Butter.

Whipped Vanilla Butter
1/4 cup butter, softened
1/4 cup vanilla baking chips
dash of salt
1 TBS whole milk

In a small bowl, beat butter and milk until light and fluffy.
Place baking chips in a microwave bowl and melt for about 45 seconds or until smooth, stirring at about 20 seconds.
Fold melted chips into whipped butter.
Place in fridge for about 10 minutes before using.


Happy Baking!

Summer Revolution?? Who's with me!?

Monday, April 11, 2011

Chocolate Peanut Butter and Banana Granola Bars


A while back I got on a granola kick and made the stuff pretty regularly.

Then, for one reason or another, I let my inner hippie down and haven't gotten around to making it in quite a long time...

Leave it to my resident barefoot hula-hooper to get on me about though; he's been bugging me to make it now for weeks okay, maybe even months.

The other weekend was one of the first in a long time that we had absolutely nothing to do- we went on a lovely date Friday night, spent the next morning weeding the garden, met some friends for fantastic Texas BBQ, and spent the rest of the time between the couch and the backyard.


Needless to say, I had no excuse but to make MM his ever so desired granola. Of course, I wasn't going to stop there, which is where these granola bars come in.

After whipping up some Basic Granola with dried cranberries and blueberries, I decided to make use of the bag of banana chips I had in the pantry..

And what goes perfectly with bananas? Peanut butter and chocolate of course!


Chocolate Peanut Butter and Banana Granola Bars

1/2 cup quick oats
1/2 cup rice krispies
1/2 cup bran flakes
2 TBS pumpkin seeds
2 TBS sunflower seeds
1/2 cup dried bananas (lightly crushed)
1/2 cup semi-sweet chocolate chips
1/2 cup honey
1/2 cup peanut butter
2 TBS oil

Preheat oven to 300 and line a small loaf pan with parchment paper.
In a large bowl, mix oats, krispies, bran flakes, seeds, bananas and chocolate chips.
In a small saucepan, over medium heat, stir peanut butter, honey and oil until peanut butter becomes thins and mixture is smooth.
Pour warm mixture over dry ingredients, mixing until granola is evenly coated- the mixture should start to clump together.
Press granola mixture into prepared pan and flatten with back of spoon or spatula.
Transfer to oven and bake for about 8 minutes.
Allow granola to cool slightly before placing in fridge to continue to cool for at least 20 minutes.
Use a plastic knife and cut into bars.


Happy Baking!

Thursday, April 7, 2011

A Dump Truck Birthday Cake


Marriage counseling has run its course...can you believe it's already been 9 weeks? 


But what does marriage counseling have anything to do with a Dump Truck Birthday Cake you ask? 

Well... everything!

During our first weeks in class, Mountain Man (who I should basically hire for my marketing manager) shared that I like to make cakes in my spare time. One of the ladies facilitating the class got extremely excited about this and the next thing I knew I had two gigs in the making.

The first cake she requested was a simple floral cake for her mother's 80th birthday...


And then a couple weeks later she asked for a dump truck inspired cake for her grandson's 2nd birthday. 

My mind immediately went to a 3D cake.

This was my third attempt at a sculpted cake and it was definitely a learning experience. 

I wish I could have taken a few more pictures of the process for you, but I get in a zone when I'm decorating and stopping to take pictures just wouldn't be possible. 

I started with two 9x13-inch sheet cakes made of my Chocolate Layer Cake that I cut into two 3x10-inch cakes. I sculpted the left overs to form the cab of the truck and the back of the truck as well (which I didn't get pictured)


I then covered the cake in a thin layer of buttercream.


Then came the hours of fondant work... there were definitely a few hiccups in this process so it might be better that there are no pictures involved. Regardless, I got the cake done and couldn't have been more pleased with how it turned out...and the customer was pretty darn happy too!


If anyone out there is thinking about making a 3D truck I have a ton of tips that I'd love to share, so feel free to shoot me an email any time! This cake was a lot of fun.. I love being a part of special celebrations!


Happy Baking!


Monday, April 4, 2011

An Austin visitor and Homemade Mallowmars


Whenever there's a chance for an adventure, E is there.

One of my oldest friends, E and I go way back...

We saw our way through the first year of high school, calling boys on her personal line, growing through our awkward phases and hanging out in basements and spent our later years slaving the summers away at The Black Pearl.

Every summer I would head up to Newport, RI, to spend a summer at the beach, working and playing the days away. E was my ultimate partner in crime... she even agreed to drive all the way from Rhode Island to Georgia to move me in to my new house at grad school.


With a knack for good food and good adventures, I couldn't have been happier when she decided to come visit us in Texas.


We spent the entire weekend exploring all that Austin had to offer- dinner at The Salt Lick, breakfast burritos, cowboy boots on South Congress, the best macarons from a little patisserie, ice cold Shiner Bock, margaritas by the lake, fried peanut butter and jelly sandwiches (are you sensing a trend here?) and we finished off the weekend with Homemade Mallowmars.


These Mallowmars consist of homemade graham crackers and homemade marshmallows dipped in warm milk chocolate.

Homemade Graham Crackers
original recipe by Baking Bites makes 48 cookies
adapted recipe makes 24

1/4 cup AP flour
1/2 cup plus 6 TBS cup whole-wheat flour
1/4 cup sugar
1/2 tsp baking powder
1/4 tsp baking soda
1/4 tsp salt
1/4 tsp cinnamon
1/4 cup cold butter, cut into 1/2 inch cubes
1 TBS honey
1 TBS molasses
2 TBS cold water
1/2 tsp vanilla extract

In a food processor, mix together flours, sugar, baking powder, baking soda, salt and cinnamon.
Add cold butter and process until mixture resembles coarse sand.
Add honey, molasses, water and vanilla.
Mix until dough starts to come together.
Place parchment paper out on kitchen counter and lightly sprinkle with flour.
Scrap dough out of mixer and onto floured parchment paper, rolling dough out 1/8 inch thick.
Transfer to fridge and chill for at least an hour.

Preheat oven to 350 and line baking sheet with parchment paper.
Cut dough with a round 1 or 2 inch cookie cutter.
Align cut-outs on parchment paper and back for about 15 minutes or until lightly browned at the edges.
Remove from oven and allow to cool.

One cookies have completely cooled, prepare marshmallows.

Homemade Marshmallows
Original Recipe by Alton Brown (I halved this)

1 1/2 packages unflavored gelatin
1/2 cup cold water, divided
3/4 cup sugar
1/2 cup corn syrup
dash of salt
1 tsp vanilla
2 TBS powdered sugar
2 TBS cup cornstarch

Spray baking dish with cooking spray.
Mix powdered sugar and cornstarch together in a small bowl.
Sprinkle one spoonful of mixture into pan and move around, making sure to cover everything as if you're flouring a cake pan- set aside.
In your stand mixer bowl, add gelatin powder and 1/2 cup water.
In a small sauce pan, add 1/2 cup water, sugar, salt and corn syrup. Place over medium heat and cover for 3-4 minutes, until boiling.
Uncover and clip candy thermometer on pan. Continue to boil until sugar mixture reaches 240 degrees, about 7-8 minutes.
Once temperature is reached immediately remove from heat.
Turn mixer on low and slowly add sugar mixture to gelatin.
Once all sugar mixture has been added, turn speed to high and continue to whip for about 10-12 minutes or until mixture thickens, becomes luke warm and looks like a glossy meringue.
Add vanilla during last minute of whipping.


Assembly
Place cookies neatly on cooled, parchment paper lined, baking sheets.
Lightly grease the inside of a pastry bag with Crisco.
Transfer marshmallow cream to bag and pipe a large dollop of marshmallow on each cookie.


Combine powdered sugar and cornstarch.
Lightly dust marshmallow topped cookies with mixture and allow to set for at least a 4 hours- we let our sit over night (covered).

Milk Chocolate Coating
1 bag milk chocolate chips
2 TBS crisco

Once cookies have set, pour chocolate chips and Crisco in a large microwave safe bowl.
Melt chips for about 2 minutes, stirring every 30 seconds, until smooth and dip-able.
Hold the cookie by the graham cracker and dunk each, marshmallow side first, into the warm chocolate, coating the entire top of the cookie.
(Our hands got pretty messy so sorry for the lack of picture)
Allow chocolate to harden and enjoy!


Happy Baking!